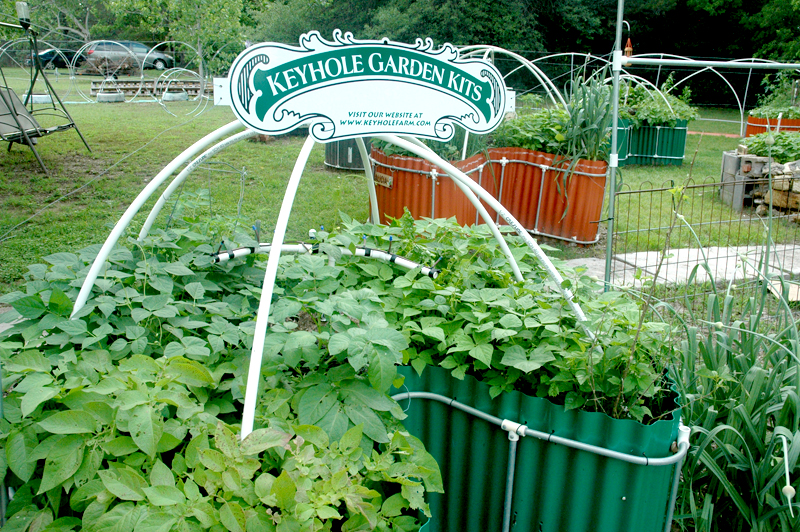
 Keyhole Farm, LLC got its start as keyholefarm.com, a website that encouraged the use of keyhole gardens as a way to enhance the growth of food crops in a manner that is easier on the body with less back-breaking work. This led to the creation of keyhole garden kits.
The company was founded by two brothers, W. Leon Smith and Lyndell Smith, who began operation as merely a way to help themselves, friends, and relatives to grow crops efficiently and in an enjoyable way. These kits help to conserve water and grow excellent crops since gardeners control the soil and can harvest crops at their peak, which enhances nourishment and taste.
 Too, the brothers were interested in seeing how long the kits would hold up and how they could be sustained in extremes of weather, which ultimately proved to be superb. As word got out about these keyhole garden kits, demand for them grew and eventually a small production business was created.
Keyhole gardens had their roots in Lesotho, Africa, where a school created the first one, with great success. Eventually word traveled and they became popular in the United States.
At one point, the French government bought five units for a Heritage Days celebration, at which these  kits, with a bamboo overlay so that they didn’t look so “industrial,” were on display in Paris, later to be used by the government in its educational division to teach children the virtues of gardening.
Below is an account of where Keyhole Farm and keyhole garden kits got their start. The article is entitled My First Keyhole Garden. Just click on the images to enlarge, then the enlargement to get back to the original size.
 MY FIRST KEYHOLE GARDEN
By W. Leon Smith
I have been around gardens all my life, from the time my mom raised one in Hamilton when I was a kid, to neighbors who had a garden and allowed me to stomp on dirt clods where potatoes were planted, to my grandmother’s garden, where I enjoyed attacking grasshoppers.
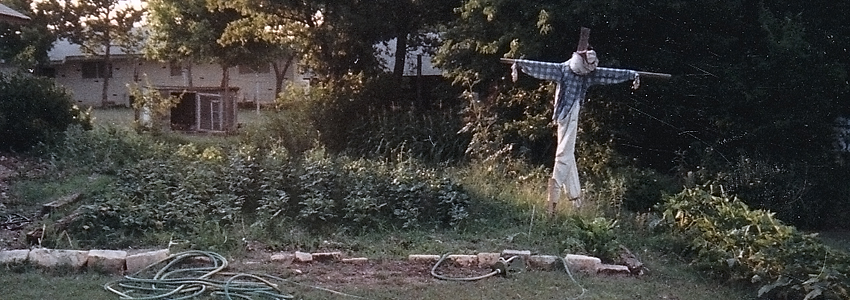
A few years ago my wife and I planted a traditional garden (see above photo), complete with a scarecrow, etc.
But gardening can be backbreaking work, dealing with weeds, picking veggies almost daily, and digging the rows and planting them. Then there is the constant chore of moving the water hoses and sprinklers. Unfortunately, a lot of the watering only serves to give thirsty weeds a drink, and it doesn’t take much for them to get their fill and grow.
 So, ultimately, we gave up gardening after a few years — it became too much of a chore and was very hard on the back. My wife has continued to raise tomatoes in flower beds, but that’s been about it.
 In January of 2009, I needed to get rid of some rocks out back at my business. The rocks simply had to go. Unfortunately, they were quite heavy and what was I going to do with them? I had read some about keyhole gardens — primarily how they are not backbreaking work to take care of and how they make efficient use of water, so I thought, “Why not build one?”
 I convinced my wife that I should have the garden and that I would take care of it myself so she would not be saddled with most of the work (as she previously had been). So I decided to locate it near a sidewalk behind my storage house. That’s where a friend (who says he did most of the lifting) and I dumped the rocks. Moving the rocks was a pain — a royal pain, which made me question if this was actually a good idea.
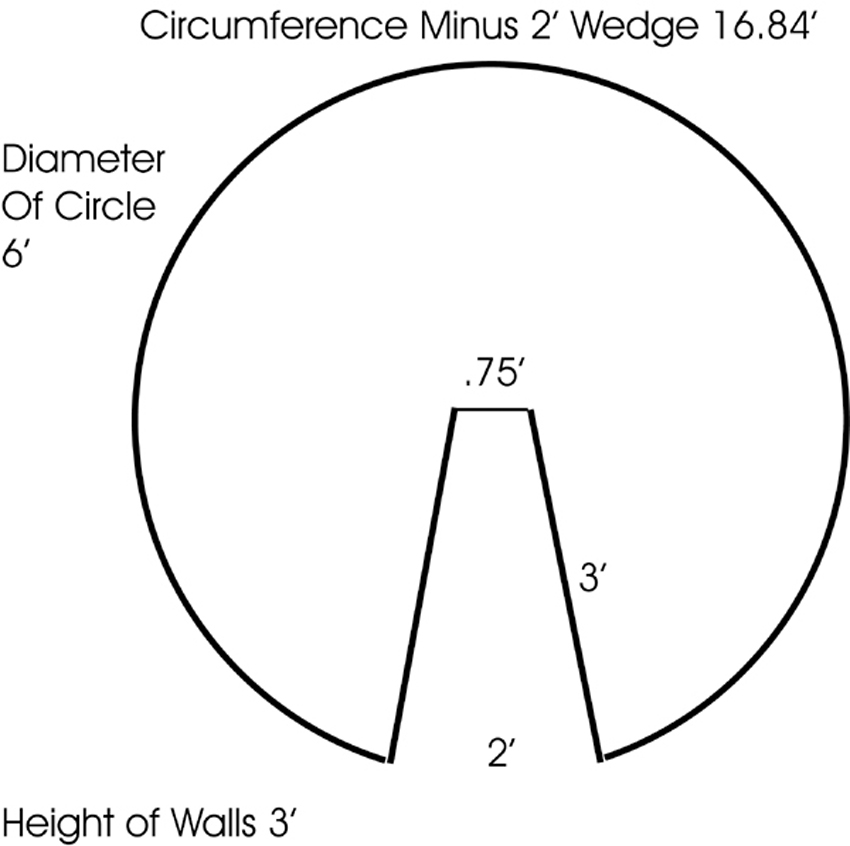
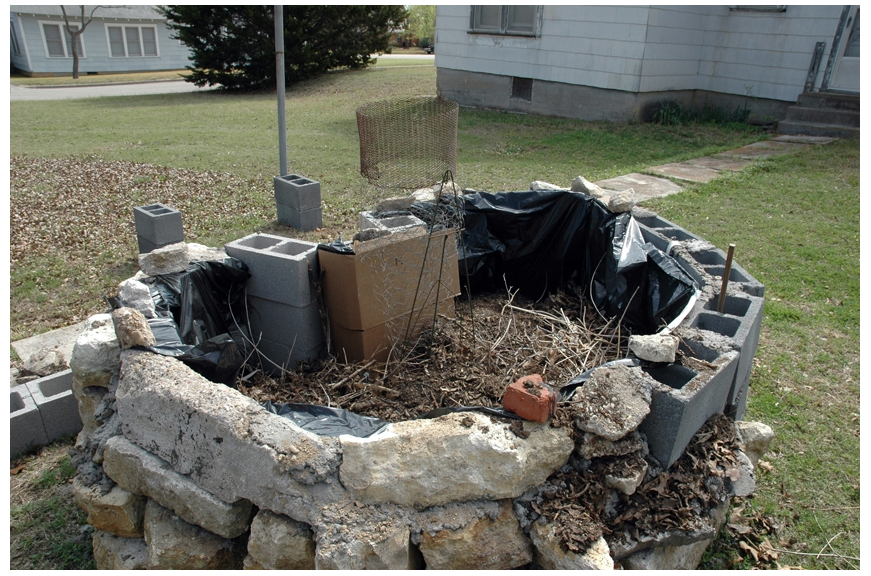
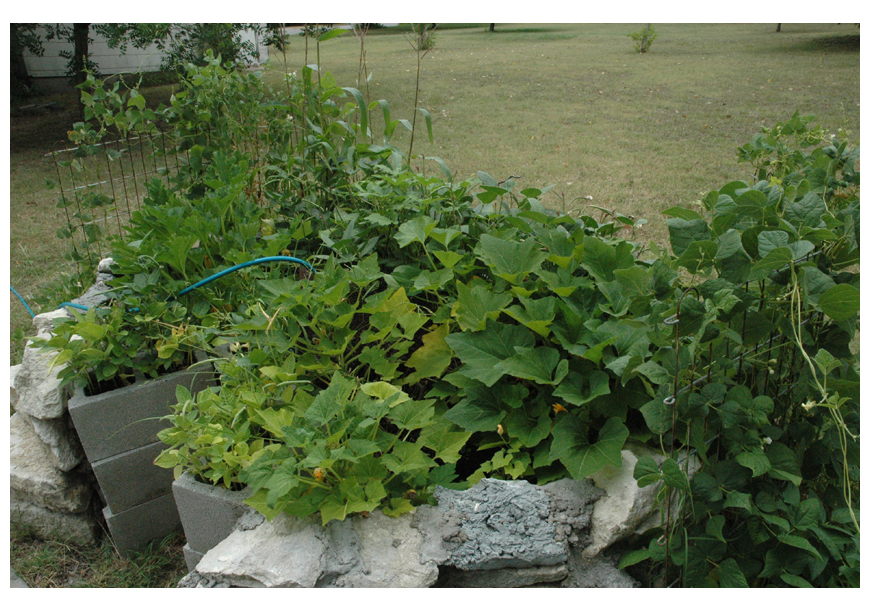
 I prepared the measurement that I was going to use in building the garden and got busy laying out the rocks (they were HEAVY). I stacked them to form the circular shape so that there wasn’t much gap in the placements. Then I had a problem. Not enough rocks. So, to improvise, I used cinder blocks for the second half, sort of. After positioning the “cinder/rocks” into the 6-foot diameter design, I got a bag of concrete and filled the holes, trying to make the structure sturdier, which worked. Patching the holes was more labor than I had counted on, as well.
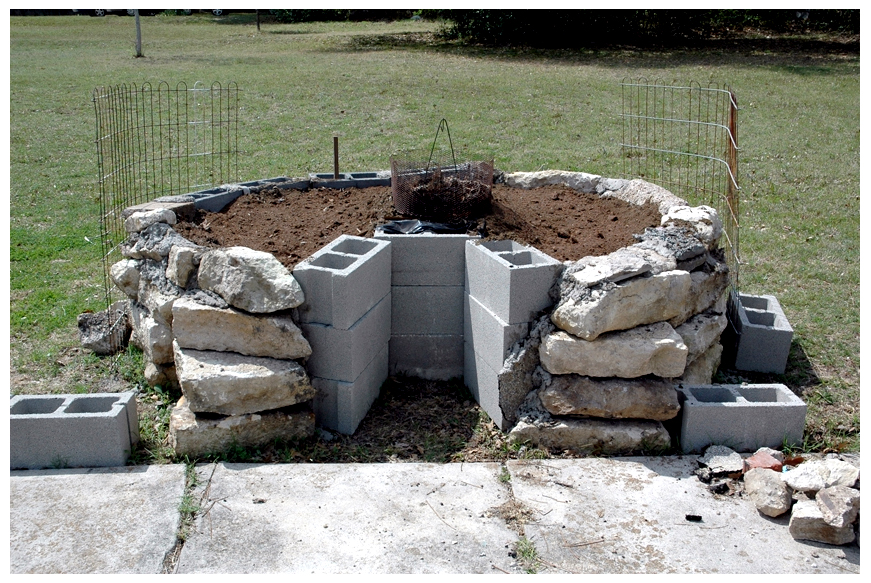
The design was approximately 3-feet high. I used cinder blocks to frame the wedge cut out of the circle and designed a cage to make the round part of the “keyhole.” For the cage I used two types of fencing wire I had laying about, but most of it was chicken wire. It is in this interior circle that I would “feed” the garden with scraps, etc. and it is where a lot of the watering took place.
N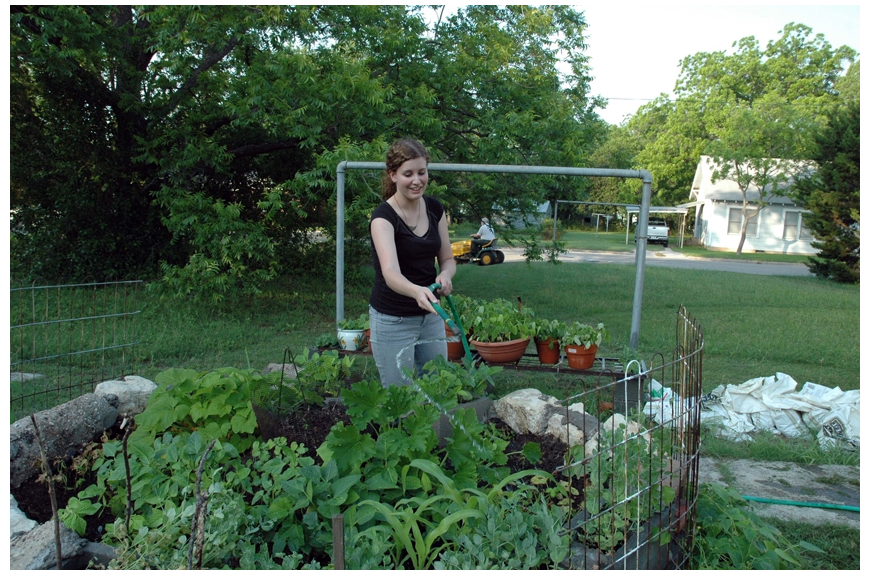 ext, I tried to layer the bottom parts of the garden with small tree limbs, leaves, grass clippings, compost, and dirt. I cut some plastic trash bags to put around the interior edges of the garden in the event I did not get all the holes patched well enough, just in case. I didn’t want the dirt to leak out when it rained.
Eventually I was nearing the top where I dumped quite a few bags of clean topsoil to build the shape I wanted.
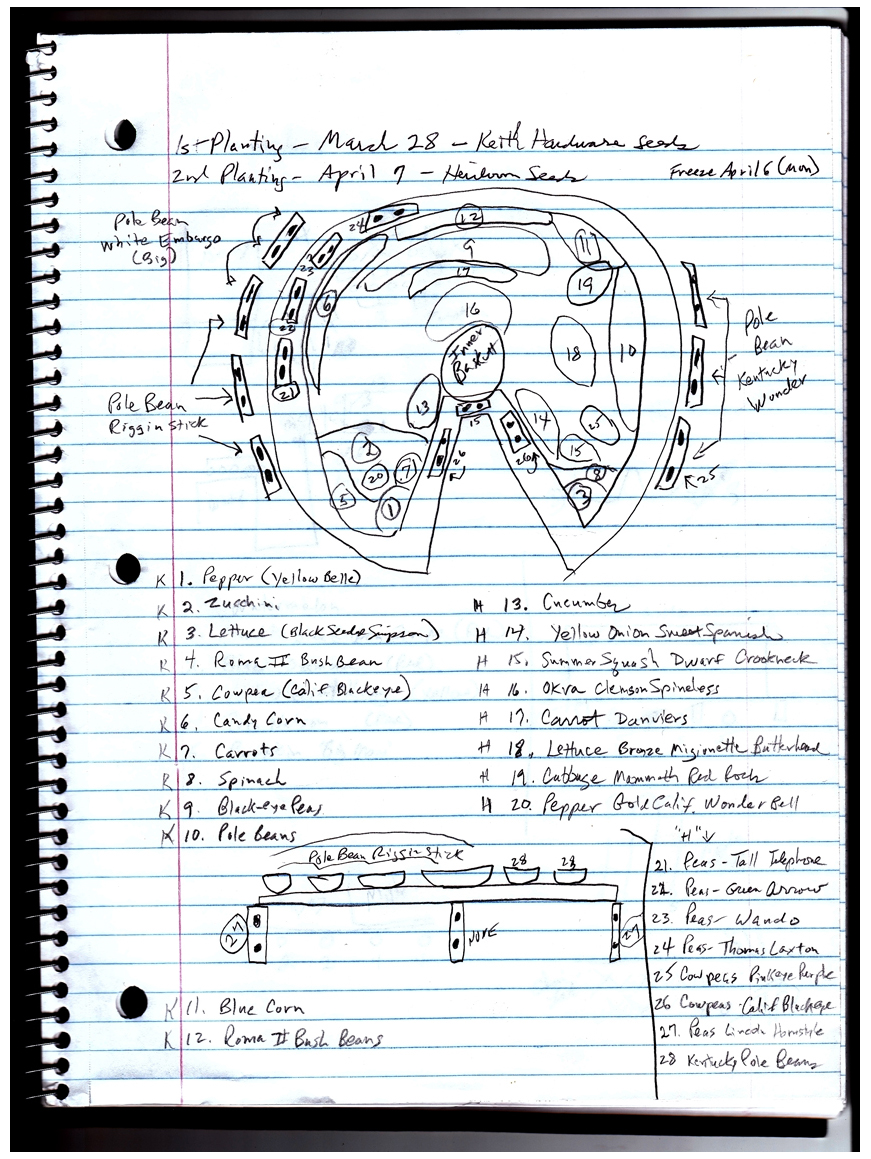
Next came planting — rather deciding what to plant. I decided that this first year’s garden would be primarily experimental, so I bought some packets of seeds locally and some I ordered online (long-term heirloom garden type brands). Some I knew would probably not produce crops down in Texas, since they are designed for “northern” climates, but I thought I would give them a try.
 There are some diagrams on this site that show what I initially planted.
Just as the initial plants barely cleared the dirt we had a freeze in early April. I had covered the top (very carefully) with taped-together newsprint to maybe help a little the night before, but I lost several green bean plants. They slowly turned yellow and died. Some of the other plants might have been impacted, as well, but I am not absolutely sure. However, I did the planting in two waves, the first on March 28 and the second on April 7. It was part of my plan to stagger them some. The freeze happened on April 6.
 As a note, I planted some of the green beans in flower planters and some in the square holes of cinder blocks, as well. Some of the cinder block plants did okay, but the ones in flower planters did not. I also put in some wire fencing on two sides of the garden in the event something wanted to climb up them. Several did.
I spent about 10-15 minutes a day watering from a hose and sprinkler, unless it rained. There’s no use washing your car in a rainstorm, so I figured that applied to plants as well. However, I did miss watering on a few sunny days when I felt the garden was moist enough.
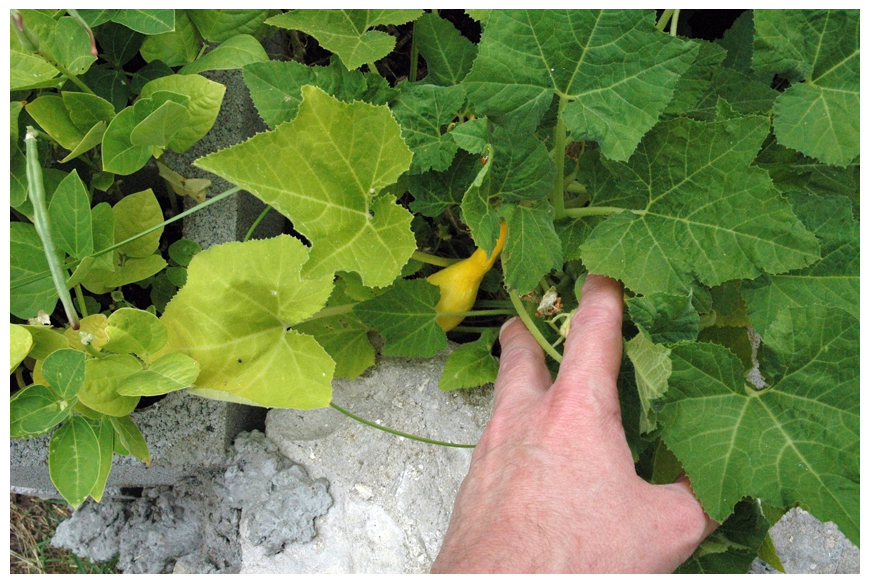
My first plants to come up and bear fruit were yellow squash and green zucchini. In fact, their leaves really overtook the garden, so much that there were times I didn’t know there was something ready to be picked under there. The plants, however, provided unwanted shade for my carrots, bell peppers, and lettuce, which I think hurt their ability to produce. Some of the green beans came up, but not that many, I think because most were outside the keyhole and in other containers. I had planted two types of corn. Blue corn did not come up at all, and the candy corn did but only produced about fist-sized ears. I only planted a few stalks, however.
 But the squash and zucchini — wow!
I planted several types of black-eyed peas. Some were purple, some green, and some were called cowpeas. By summertime, they were producing like crazy. Every other day I would pick a mess big enough for a meal and, if picked right, a new pod would start growing in its place. This went on for about two months, maybe a little longer. Mid-summer, I pulled up the squash and zucchini and planted okra. These grew into very tall plants and produced in abundance. Their pods have to be watched closely since they get big almost overnight. Too big and they are too hard to properly cook (I was lectured on this when I brought in some gigantic pods). But I was flabbergasted at how much they can produce.
 During the growing season we experienced a lot of rain early-on (like May), but it got very dry in the middle of the summer (up to 104 degrees F). Toward the end of the growing season I got busy with several time-consuming business concerns (not related to the keyhole) and neglected the garden as a result. I did pull up the black-eyes when their production went down a lot, but did nothing to the okra.
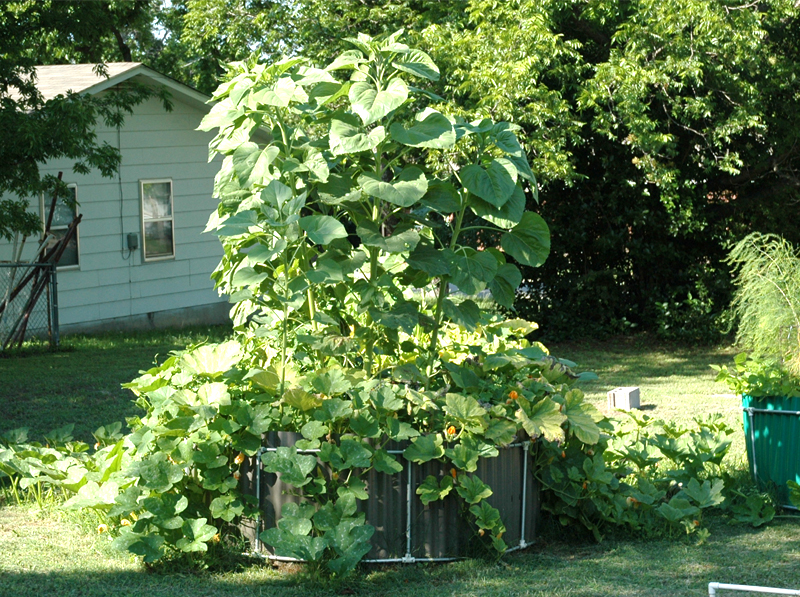
Now, I am getting ready for round two. I will need to repack the ground in the garden some (it has sunk a little), put in some dead leaves and a little new topsoil and, very importantly, decide what I want to plant this year and how I am going to space the plants. It is somewhat exciting to get back in the groove on my keyhole garden and try to learn from mistakes made last year. I do know for sure I’ll grow black-eyed peas, squash, and zucchini, and probably a bunch of green beans. I really want some bell peppers. I will probably forego carrots, lettuce, and corn. But this is just me musing as I write this piece. Come next week, who knows? Maybe some onions and a turnip or two, or, better yet, jalapenos, my favorite! Too, I wonder if I bring in some sandy soil and grow a patch of peanuts. Or better yet, sunflowers! They get pretty tall. I wonder if they would get even taller in a keyhole garden?
One thing keeps going through my mind, which is part of the reason we created this website. Growing that first keyhole garden was a hugely rewarding experience. I live in rural Texas which tends to make it easier to have one. But what about people in cities who are space deprived for a regular garden? Could they manage a keyhole garden? And what about people who are perhaps older and don’t want to bend over so much (like I’m getting to be, according to certain family members). They might like to have one.
So my brother and I have been trying to come up with ideas on how to produce keyhole gardens that are cost effective and that are quick and easy to install without too much labor. Besides, I am out of rocks and don’t want to lift a bunch of cinder blocks. For many people this simply would not work anyway.
 We’ve decided to build three or four new keyhole gardens this year, near the original one, probably each with different materials. Experimental! We want to determine how long it takes to build one, what materials to use, and how they stand up over time. We will keep you posted on how it goes from this site. Please check back occasionally. I hope we have inspired you to consider a keyhole garden, which in a way is a microcosm of the past. Maybe you could teach your kids to grow edible plants, and have fun yourself as you do it. Put a scarecrow in and tell them some scary stories. I would have put one in my first keyhole garden if I only had a brain. Then again, maybe I grew one with my keyhole garden this year, but I’ll bet it gets picked.
Update: On March 3, I decided to clean out my original keyhole garden to begin preparations for this year’s planting. I pulled up weeds and the tall okra stalks, primarily, but something unexpected that I found really amazed me. There was a green-topped carrot plant that I pulled up that had apparently survived snow and sleet. There was a five-inch carrot on it, which I ate after showing it around.
Three Years Later — A Design Is Invented and Tested
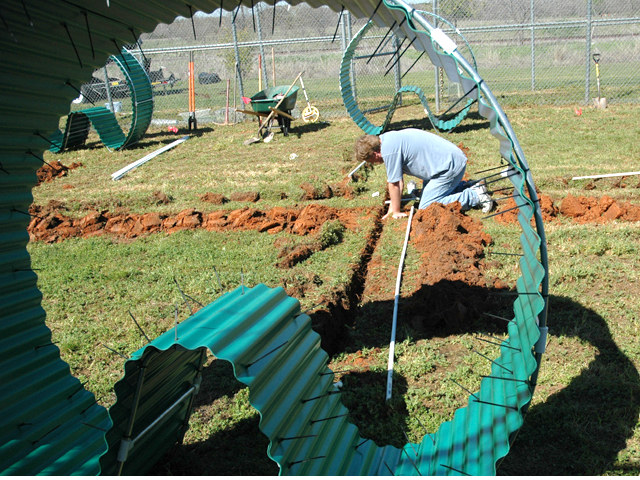
 After that first rock and cinder block garden, new easy-to-put-together, lightweight, and durable keyhole garden kits were invented by the two brothers, who wanted to determine whether the keyhole garden kits could withstand time. A certain cost goes into manufacturing each of the keyhole garden kits, so they wanted to determine if it was worthwhile to go to the trouble to build the kits. The original keyhole garden unit, named Alicia after their grandmother, was constructed in 2009. As of 2017, The original experimental keyhole garden kits are still in use and growing great crops. How long they will last is unknown, but with eight years under its belt, these keyhole garden kits have already surpassed their expectations.
The below article was the first blog posted after the one above, in approximately 2012.
Keyhole Gardens — Key To The Future!
By W. Leon Smith (published in 2012)
During the past four years, I have been involved in keyhole gardening, much of which was doing in raised bed fashion with the keyhole garden kits we invented..
 We began with a rock and cinder block version the first year, after which, due to the time consuming experience of building one, my brother and I decided to try to develop an easier way.
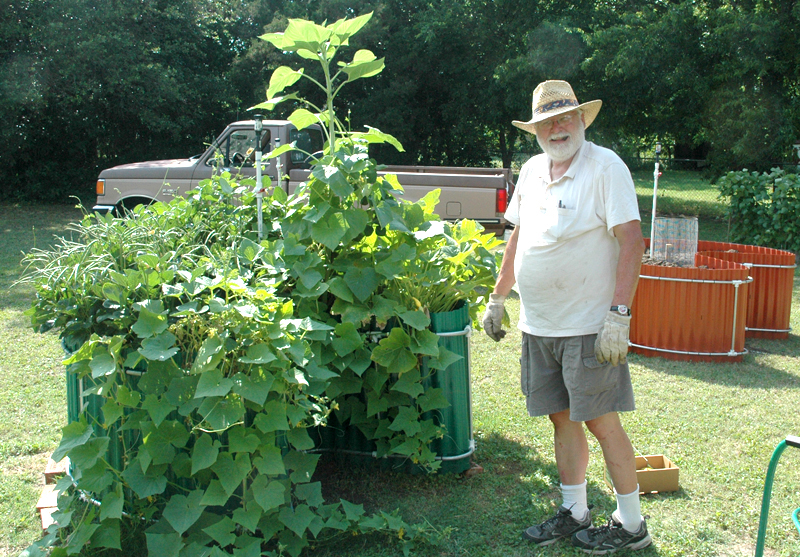
We did considerable experimenting and came up with a newer version, keyhole garden kits, light in weight, that if provided in kit form can be constructed in about an hour.
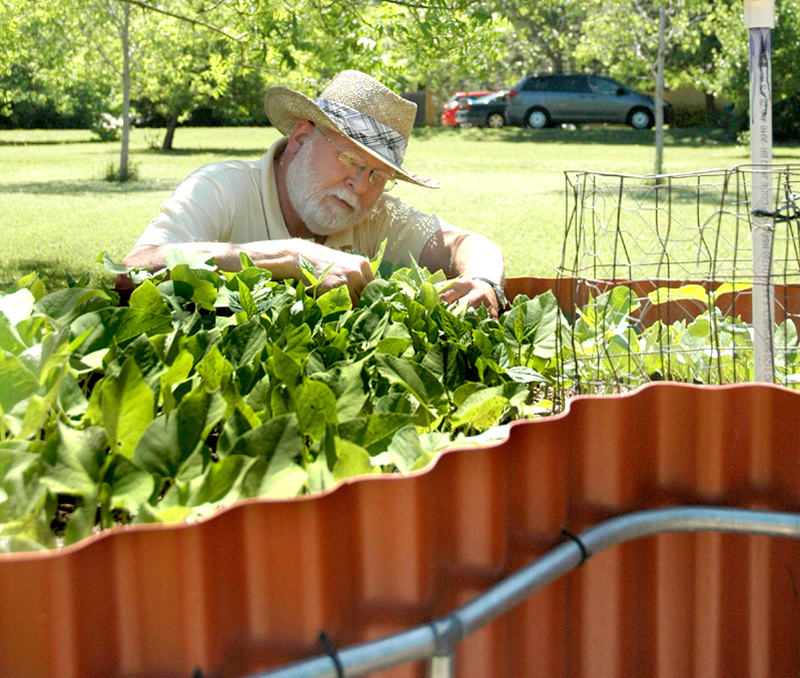
The beauty of keyhole gardens is that they are easy on the back, you can plant crops closer together than in a conventional garden, they take up smaller space, crops are easily accessed via the keyhole design, and they are extremely water efficient. The lack of weeding is another huge advantage.
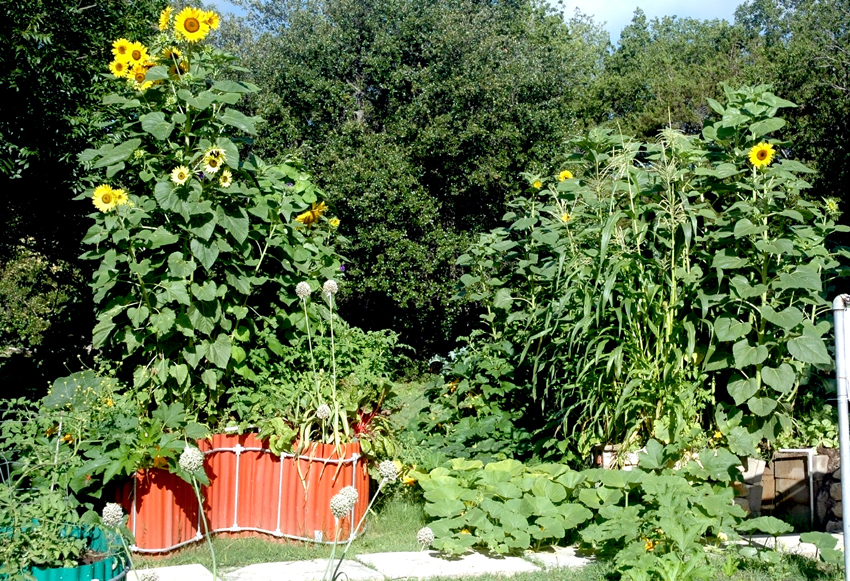
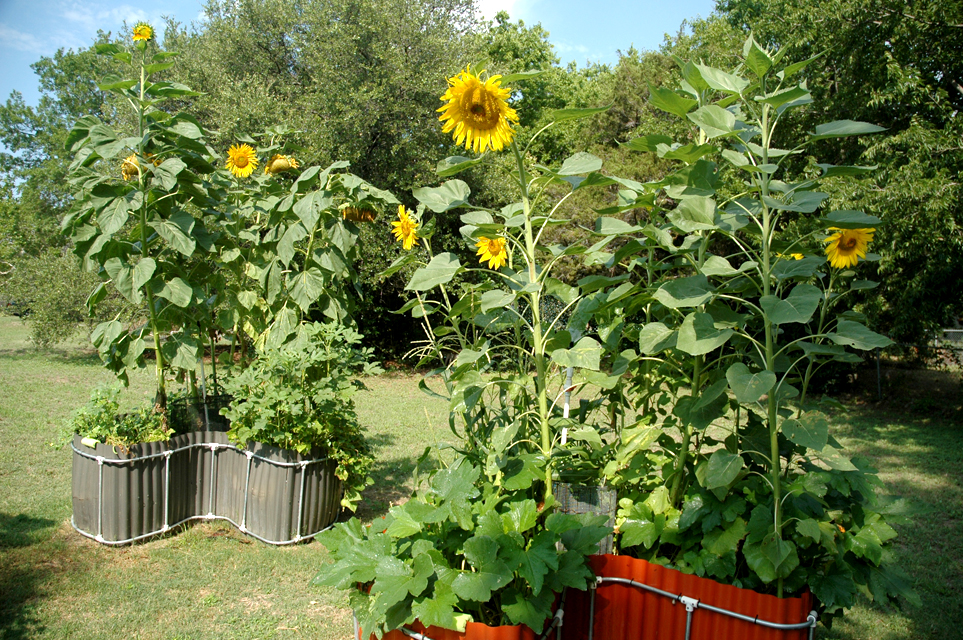
During our experiments over the past three years with the keyhole garden kits, we have planted numerous crops, from watermelons, to pumpkins, to okra, to green beans, to black-eyed-peas, to tomatoes, to asparagus, to onions, to carrots, to cabbage, to lettuce, to jalapenos, to cucumbers, to zucchini, to squash, to melons, to cantaloupes, to numerous herbs and other plants, many of the aforementioned in a variety of types. My favorites are sunflowers.
 The original keyholefarm.com website consisted of several updates each year as our experiment on the durability of the gardens progressed, but in our recent re-design we decided to feature a few photos in our header and let readers know that our gardens have proved successful.
A keyhole garden is circular in design looking down at it, but has a pie-shaped wedge cut out and a circular wire basket placed at the tip of the wedge, making it resemble an old-timey keyhole, thus the name.
These gardens can be watered with a hose, or with sprinklers. On ours, we place layers of cardboard, leaves, cut grass, small tree branches, compost, and other ingredients, usually putting about two feet of topsoil on top, water it in, let the level sink a little as some of the ingredients settle, then add more topsoil. The topsoil is angled down slightly from the interior basket which is edged with a higher level of dirt.
The basket is used to “feed” the garden, either via water or certain left-over foodstuff, like banana peels and left-over veggies. The idea is to provide moisture and minerals in this manner to embrace recycling.
 On our gardens, we generally try to group crops, thinking ahead to allow greatest sun exposure as they grow. Most of our plantings are done by poking holes in the dirt about two or three inches apart and then going back and placing the seeds in those holes before covering them up and smoothing out the surface some.
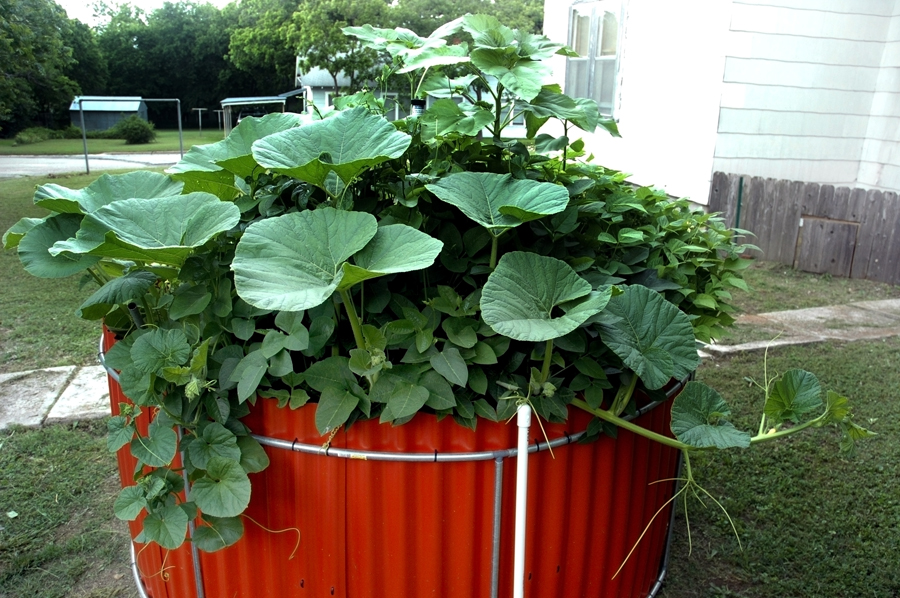
You can expect an “overflow” reaction as some plants grow over the sides and deposit their fruits on the ground. This was our experience with watermelons, pumpkins, many cucumbers, certain melons, cantaloupes, and tomatoes, to name a few.
 Because we plant the crops so close together, it is quite an adventure to find all the crops when they are ready to pick, for the garden is thick with them. Here in Central Texas, we usually do a second planting mid-summer by planting cowpeas and okra which tolerate hot weather better. It is amazing to watch these plants produce and reproduce many times during the hot months.
We firmly believe that our keyhole garden kits will be the wave of the future since they are so compact and produce extremely well, conserving water at the same time.
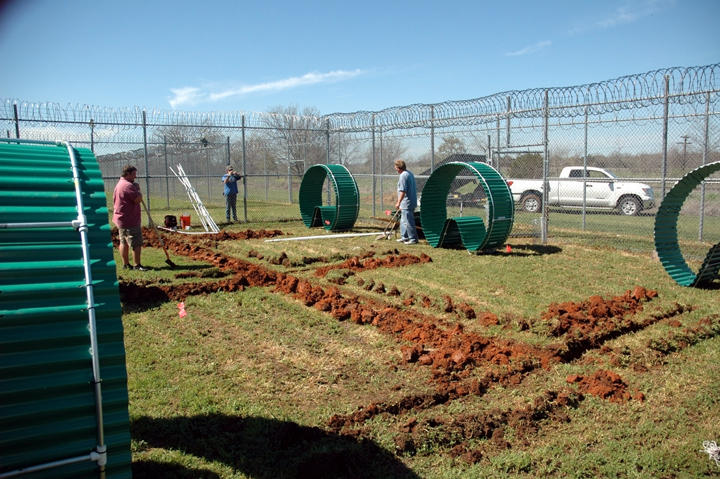 Keyholefarm.com is currently working with a Texas charter school to install six keyhole garden kits on that campus.
The idea is to tie the growing of keyhole gardens to subjects such as geography, economics, science, and mathematics as they pertain to agriculture.
Students will have the opportunity to raise crops and keep track of growth statistics and experiments that they conduct. Providing advice will be the county Extension agent and Master Gardeners.
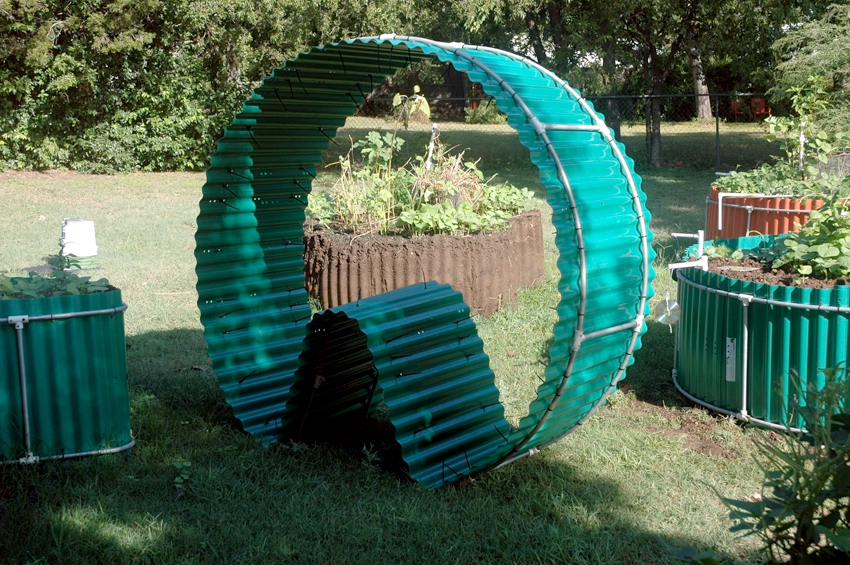
 Too, we are always trying to improve our designs of keyhole garden kits and testing the quality of our products. Recently, we decided to put a bamboo skirt around one of our gardens to “see how it looks” in the event it might make our garden kits fit better into some environments. We are constantly experimenting with a variety seeds, watching growing seasons as to weather, and enjoying the birds and the bees as they watch us work.
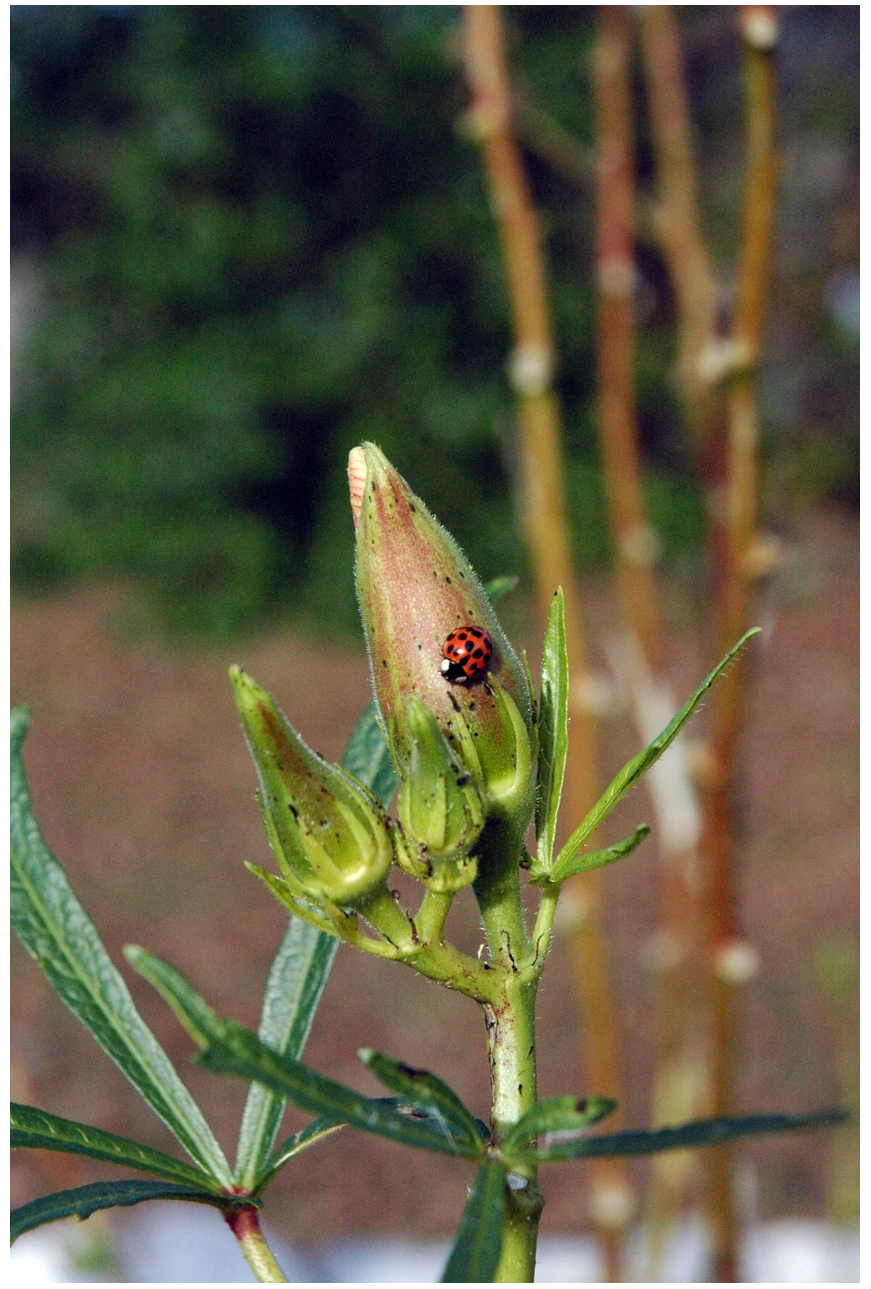
 There is something magic about raising some of your own crops, turning your hands into plowshares and learning about a key element of survival. Now, with keyhole gardens, you can turn a corner of your own backyard into a showcase that has its roots deeply buried in something you created and nurtured.Please consider our keyhole garden kits as a means to a satisfying end.