Experiment Number One
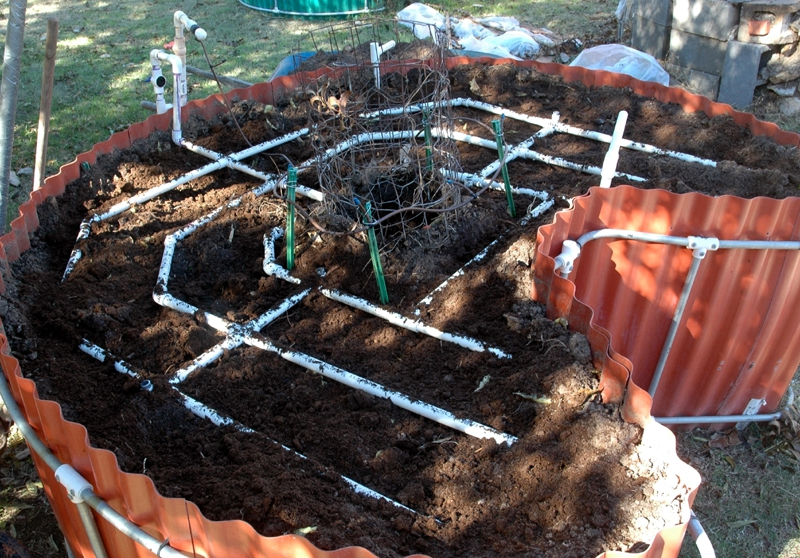 The metamorphosis of our methods of watering are the following: the first year, we used a water hose on our single keyhole which was made of rocks and cinder blocks. The second year, when we installed the first keyhole made from a kit, we ran a half-inch line from a water spigot that was attached to a house a distance to the keyholes and installed a center half-inch upright pipe inside the keyhole to which we placed a sprinkler that would water the keyhole but avoid the cut-out wedge part. On additional keyholes that we installed in the following years, we did the same.
 Three years ago, we modified about half our keyholes’ watering devices to experiment with macro-tubing and smaller sprinkler heads, putting them on the outside of the garden (the perimeter) and aiming them inside. Then the next year, we decided to change this and instead put the macro-tubing sprinkler heads around the interior keyhole basket and have them shoot toward the outside. This took fewer sprinkler heads and less tubing.
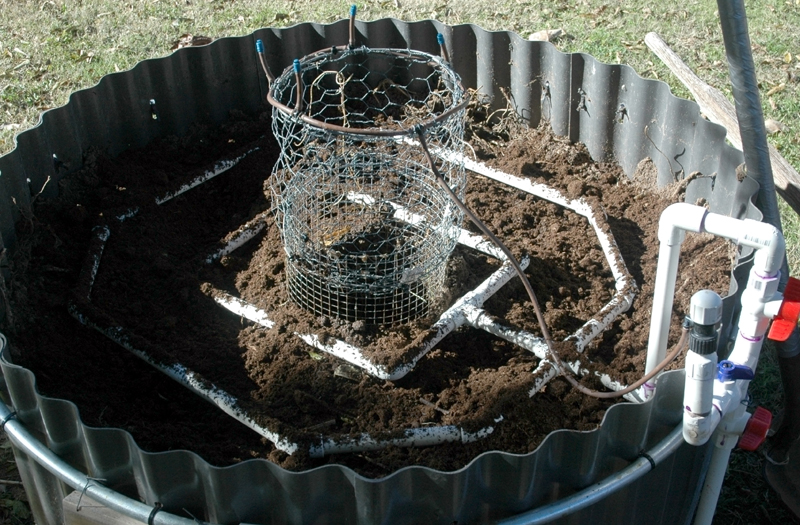 All of these methods worked very well. My main idea was to conserve water. It is important to note that by utilizing the internal basket to its maximum by filling it with old veggie parts, etc., very little watering is necessary since the design promotes the circulation of natural nutrients and moisture inside the garden. If you do summer gardening, however, a supplemental water supply will likely be needed, but again, not a whole lot of water.
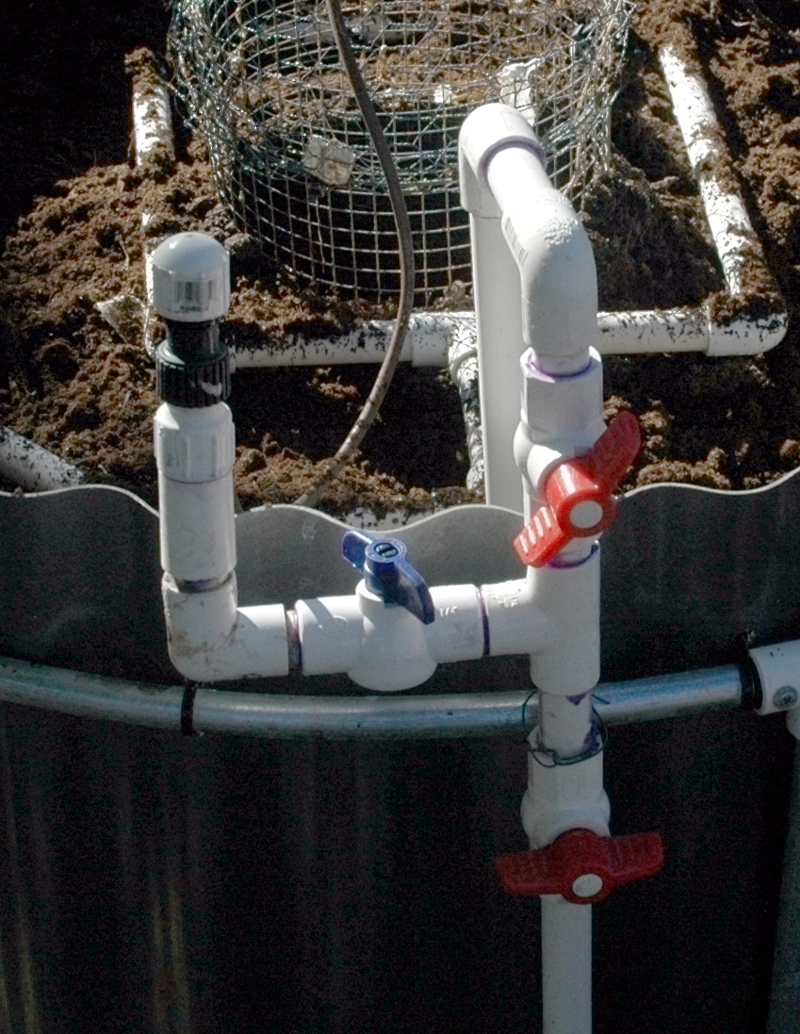
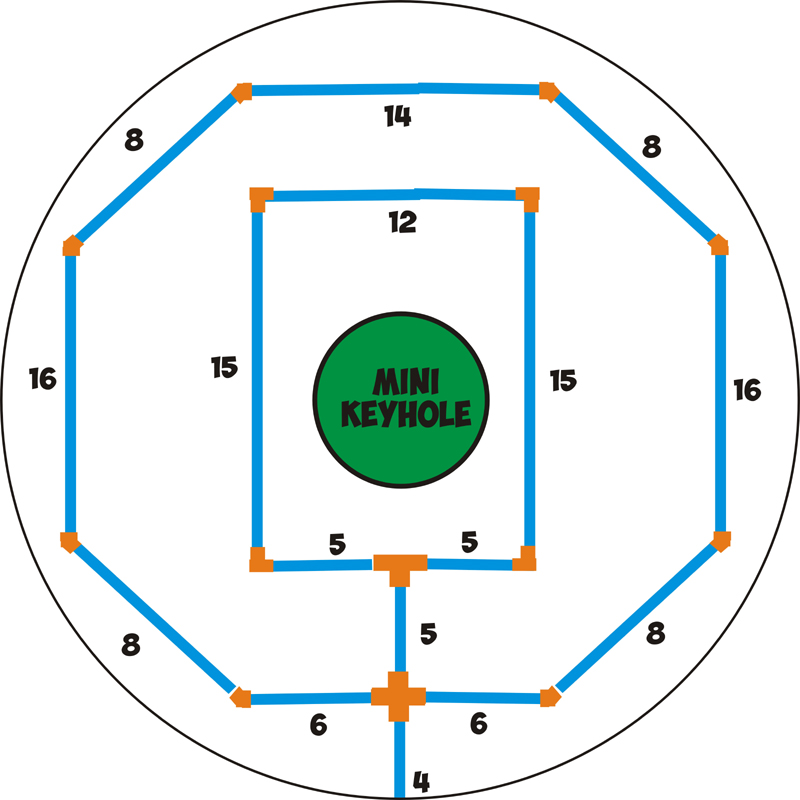 My newest experiment has to do with rigging an internal water device while keeping the top method intact. Whether it works well is still unknown, but I devised a plan for both the regular keyhole garden and the mini kitchen gardens that we offer. Basically, it is one-half-inch PVC pipe cut to certain lengths with tiny holes drilled in the sides and then assembled with elbows and tees and attached to the keyhole’s main water supply. There are three valves, one to control water to that particular garden, then one for the top watering system and one for the inside watering system, so you can turn each of them off and on and adjust the flow of water.
 My goal in this is to attempt to promote deeper roots on the plants while at the same time discouraging snails. I will use the upper sprinkler system to help the plants get started, then switch to the underground method. Some diagrams on this page show what I am talking about. Whether it works is yet to be seen. If you have any particular questions about this system, please feel free to e-mail me or call.
Experiment Number Two
I recently spoke with Dr. Deb (Deb Tolman) about the upcoming keyhole garden tour to be held in Clifton. One thing she told me really blew my mind and could have a major impact on gardening as we know it. She asked me if I knew you can eat many of the leaves of plants commonly grown in a garden, such as okra, beans, peas, for instance. I had never considered that. She recommended that I read a book by David Kennedy entitled Eat Your Greens, The Surprising Power of Home Grown Leaf Crops, which I did.
 I highly recommend this book to all gardeners. On the back of the cover, it notes that the book “shows how familiar garden plants such as sweet potatoes, okra, beans, peas, and pumpkins can be grown to provide both nourishing leaves and other calorie- and protein-rich foods” and “introduces a variety of non-traditional alternatives readily adapted to local growing conditions, such as chaya, moringa, toon, and wolfberry.” The book contains information on many, many other plants, as well.
As an example, Kennedy quotes James Duke in his Handbook of Legumes of World Economic Importance, “growing cowpeas for leaves can produce, per day, nine times more calories, 15 times more protein, 90 times more calcium, and thousands of times more vitamin C and beta-carotene, than growing the same crop for seed.”
Eat Your Greens details how much of the leaf content you can safely eat without drastically curtailing the regular crop. You can have your cake and eat it, too.
The book goes into great detail about the escalating importance of kitchen-type gardens in our society, lists numerous crops along with details about them that go way beyond what you normally find on a seed packet, plus provides information about which leaves you can pick and eat right there, which ones need a little cooking, and which once work well dried.
Many of these crops are already staples in my keyhole gardens, but there are a few more I want to experiment with. I am eager to try some of the leaves, especially to spice up my salads.
To me, the value of keyhole gardening just went through the roof after reading this book.
It’s nearly that time…..SPRING PLANTING SEASON, so now is a good time to make plans. It’s a great time to order your keyhole garden kit so you will be ready to have your own backyard keyhole farm.
 FEBRUARY 18 UPDATE: We have been experimenting (as usual) with plants at Keyhole Farm and substituted carbonated water instead of regular water in attempting to germinate some seeds. Surprisingly, five black-eyed-peas and two fox cherry tomato seeds germinated in less than 24 hours. We are going to try this process on other types of seeds, as well, but I was wondering if anyone else out there has attempted this and could perhaps give some pointers. The ones utilizing plain water are still playing the waiting game.
SECOND TEST
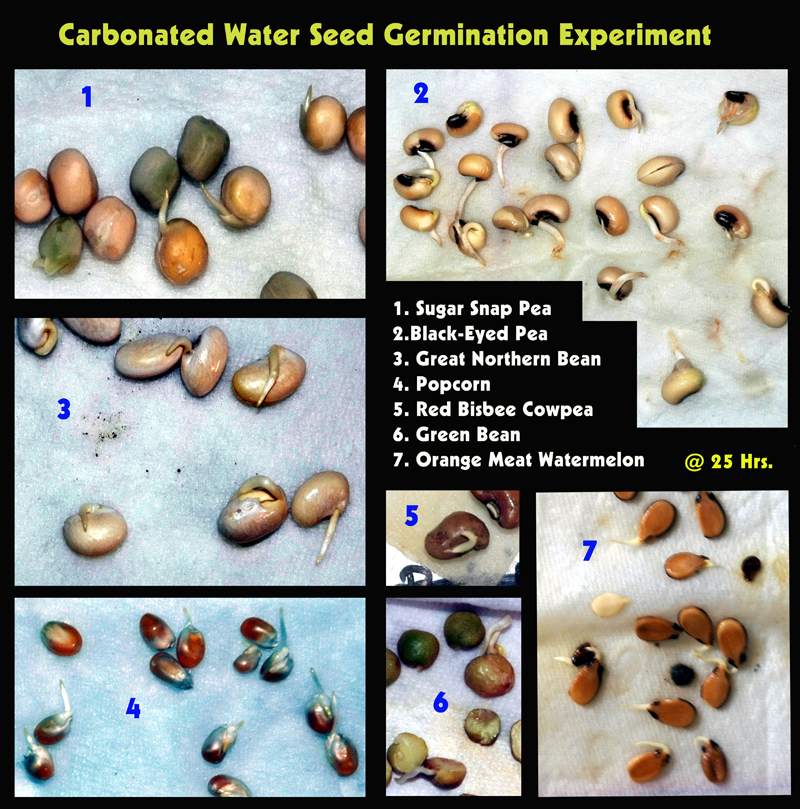
I did conduct a second test on several seeds at Keyhole Farm Feb. 23 to see if they would germinate quicker by using carbonated water (as opposed to regular water), similar to a previous experiment (mentioned above). In 25 hours the results were very good and here is a photo of some of them. Seeds that quickly germinated included sugar snap peas, black-eyed peas, Great Northern beans, popcorn, Red Bisbee cowpeas, green beans, and orange-meated watermelons. I am still waiting on the blackberry, runner beans, pinto beans, apple seed, wonder beans, and cantaloupe that were also part of the test. I utilized the paper towel, zipper plastic bag method and hung them on a wire in warm room.
Keyhole Farm has spent a lot of time during December 2014 and January 2015 updating our jigs, devices that we use to produce the components of our keyhole garden kits. This task is easier accomplished in the so-called “off season” when we aren’t so rushed to ship kits, but a lot of people and schools have been ordering kits during this off-season which has kept us very busy.
This is also a time when we experiment or make preparations to experiment with new innovations, new at least for us.