 Generally, I do not raise a winter garden largely because I am usually wiped out after the first three seasons that are so busy, so I normally just tinker with it, trying to find new ways to protect the few crops that I do raise in the cold season. However, this year I decided that five of my dozen keyholes will do winter duty with my latest experiment.
 I wanted to construct very cheaply a covered dome, somewhat like a mini-greenhouse, over each of these target gardens, one that can be easily dismantled, that can provide access to the crops inside, and can offer protection from icy weather. Whether the newly designed model works is yet to be determined (and there are probably better ways), but here is what I have done to this point.
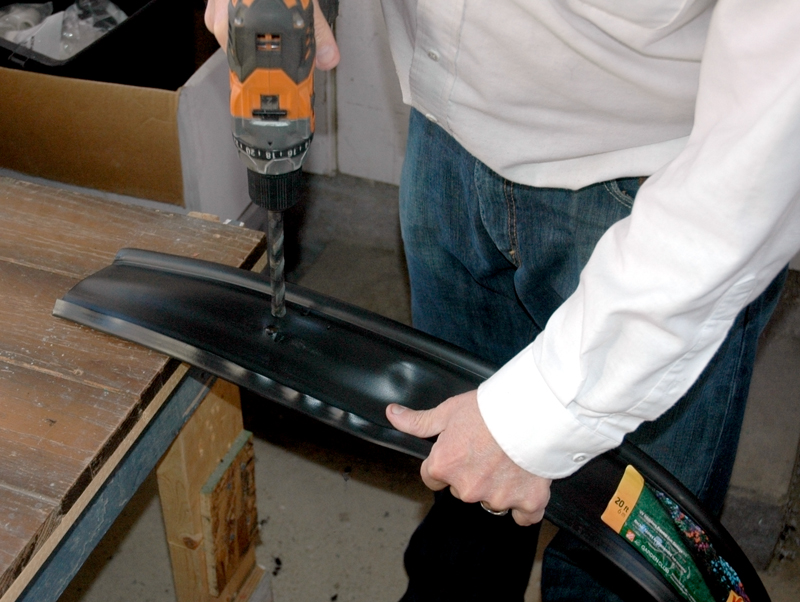
First, I obtained some plastic landscape edging that is about three or four inches high and comes bundled like a water hose, in circular fashion. Twenty-feet fits just about perfectly in one of our regular keyhole garden kits, to be put on the interior edge just inside the garden. It takes about 12 feet to circle our mini-kits.
 Next, I bought some white freeze cloth and cut it (for a regular-sized keyhole) 21 ft. x 12 ft. I drilled a couple of holes as a set (with a big bit) in the landscape edging near the middle. In all there were about eight or nine sets, spread somewhat equally apart. The coupled holes are about two inches apart.
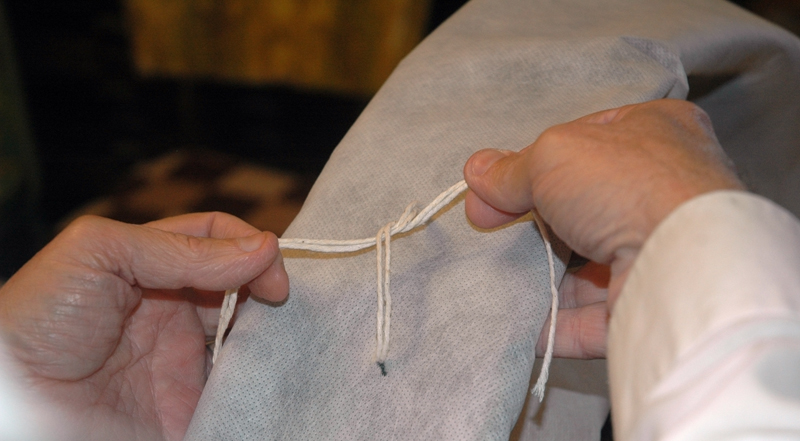
 Then I brought the long length of cloth parallel with the edging, but folded over the edging, and “sewed” the cloth to the edging, in one hole and out the other, sticking the string through the cloth over the holes and tying the cloth into place. (see illustrations) You therefore had the cloth attached the length of the edging plus slightly over (six inches on each side), and the height of 12′ was reduced slightly since part of the height was used on the outside of the edging and part on the inside, the edging sitting on a fold of the cloth in the middle. The sewing string was put through both the inside and outside cloth and then tightly tied.
 I am probably the worst seamstress in the world, but I got it done. I found a rusty piece of baling wire to use as the needle; I sharpened one end a little and created a small loop at the other end as an eye for the multi-ply cotton string to go through. I had a friend watching this portion of the operation and he gave me a weird, incredulous look when I said after poking the first hole through the fabric and stabbing myself in the finger, “Don’t worry, it’s only rust. Rust is a natural ingredient so I’ll be all right.”
Next, I measured about three inches from the perpendicular edges of the remaining cloth, the part that extended past the edging on each end, and put in a few grommets on each of the sides. I added one extra grommet near the top on one of the sides. I took the contraption outside and positioned the edging inside the keyhole garden and decided where I wanted the vertical seam to go, which was, for me, at the place where my watering system entered the keyhole. I let the fabric sweep over the outside edges of the keyhole onto the ground. I installed a few stakes inside the keyhole next to the edging to keep it in place and on the outside placed a few ties attached to the keyhole frame to anchor the edging down.
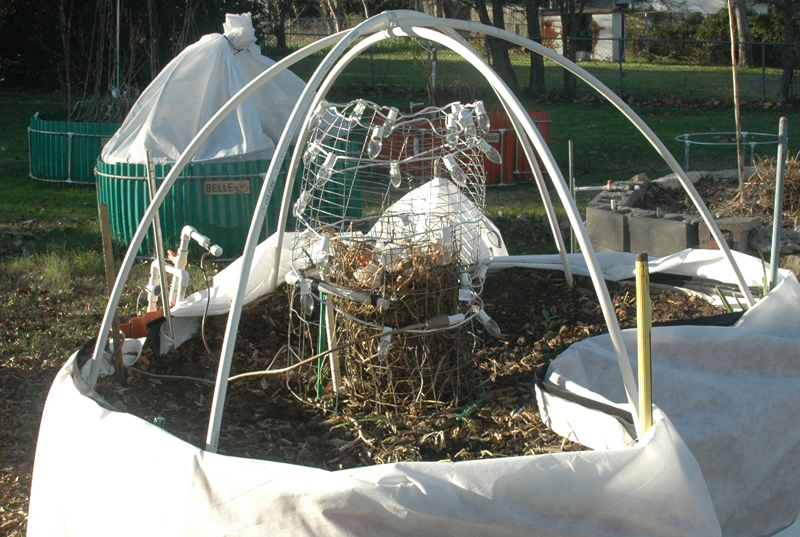
Then came the canopy. I used three 10′ pieces of 1/2″ PVC pipe, forcing one side into the ground inside the garden near the edge, bowing it up toward the middle and down on the opposite side, planting the near side into the ground on the edge in front of me, creating an arch. I repeated this for the other two PVC pipe pieces, evenly spacing them and let them sit one on top of the other in the middle of the garden. I then wired them together at the point they met on the top so that they could not move.
I then brought in some old pieces of wire fencing material, creating a cylinder bigger than the internal basket and put it over the basket. This fencing stood taller than the basket but was not as tall as the top of the canopy. I wired the fencing to the internal basket and to the top of the canopy so that the fencing would stay in place.
Next, I obtained a string of C9 clear Christmas lights (on sale) and installed the bulbs onto and around the fencing, being careful that wires were safely positioned. I then connected the light string to an extension cord that ran to a surge protector and plug into the workshop.

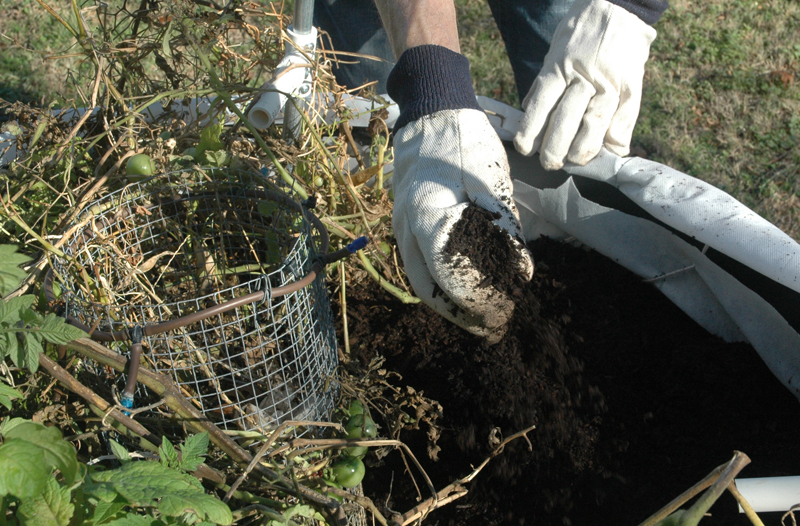 Planting was the next chore. On Dec. 19, I had begun my attempt to germinate some seeds, the paper towel method and using carbonated water (see an earlier post for details). I didn’t check them until Dec. 22 and by then probably 95 percent of the seeds had germinated and a few had some green leaves coming out already. Among the seeds I planted were Great Northern beans, pinto beans, black-eyed peas, carrots, onions, kale, spinach, serpent melons, two types of watermelons, radishes, and a few other types of seeds, plus some potato wedges with eyes sticking upward. I finished setting all this up on the morning of Dec. 24, which still involved running narrow rope through the grommets to seal the opening on one side of the dome and using the spare grommet near the top to secure a separate rope that would be used for tying the sides of the cloth, pulled to the top as a bunch.
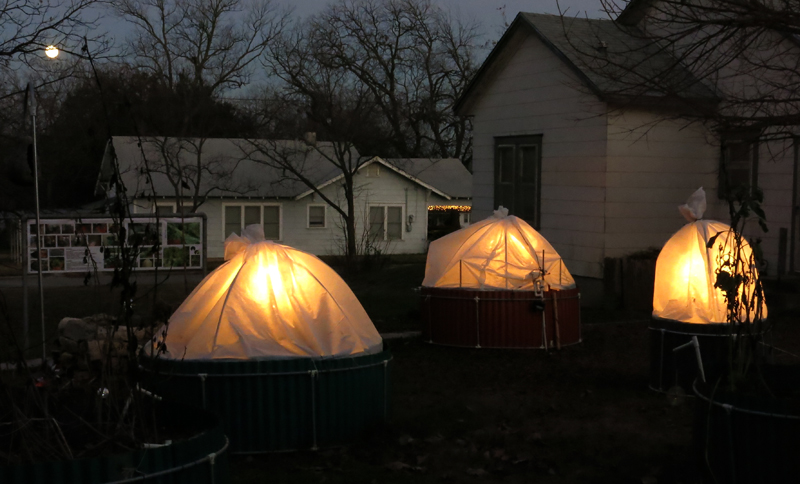
 When completed, I turned on the lights to see what would happen.
Interestingly, dark was near and soon cars were stopping by and staring at these “cupcakes with frosting on top” as they tried to figure out “what type of Christmas decoration is that supposed to be?” It was Christmas eve and families had been driving around town looking at Yuletide lights.
The goal behind this experiment was to have a “regular” spring crop in the dead of winter, utilizing the diffused light from the multiple bulbs to surround the plants and persuade them to grow. I have as an option to replace them with a lamp. The freeze cloth was designed to be not touching plants, easy to “tie” and “untie,” the set-up to be perhaps used a little each evening to make up for extended darkness during wintertime, more like a spring or summer growing season might be.

 The lights inside also provide some heat. So…when it’s nice outside, I uncover them so plants can get accustomed to regular sunlight. When it’s freezing, the cloth is brought up and tied and the lights are turned on.
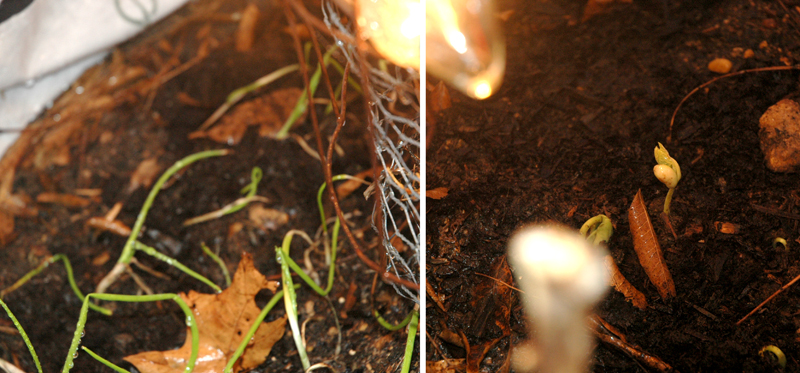
As it stands as of this writing, some of the plants are beginning to break the surface. We’ll see how they do.
Prior to leaving this post, let me remind you of my new book, Plant Your Garden In A Keyhole, available from Amazon. Just click on the link in the upper portion of the left column to visit that site.
It’s a good time to start planning for spring planting!